
















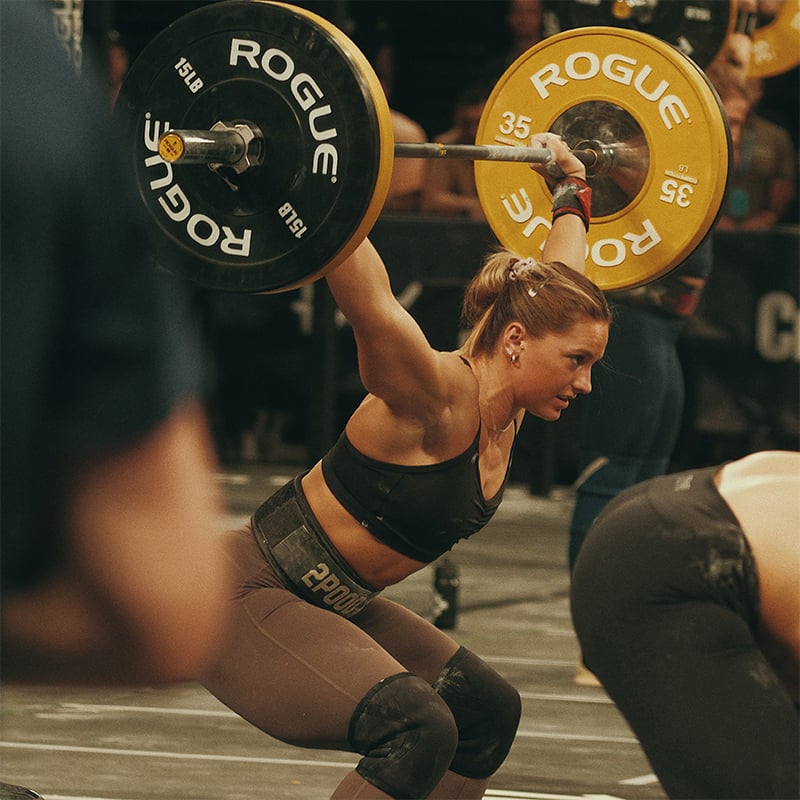
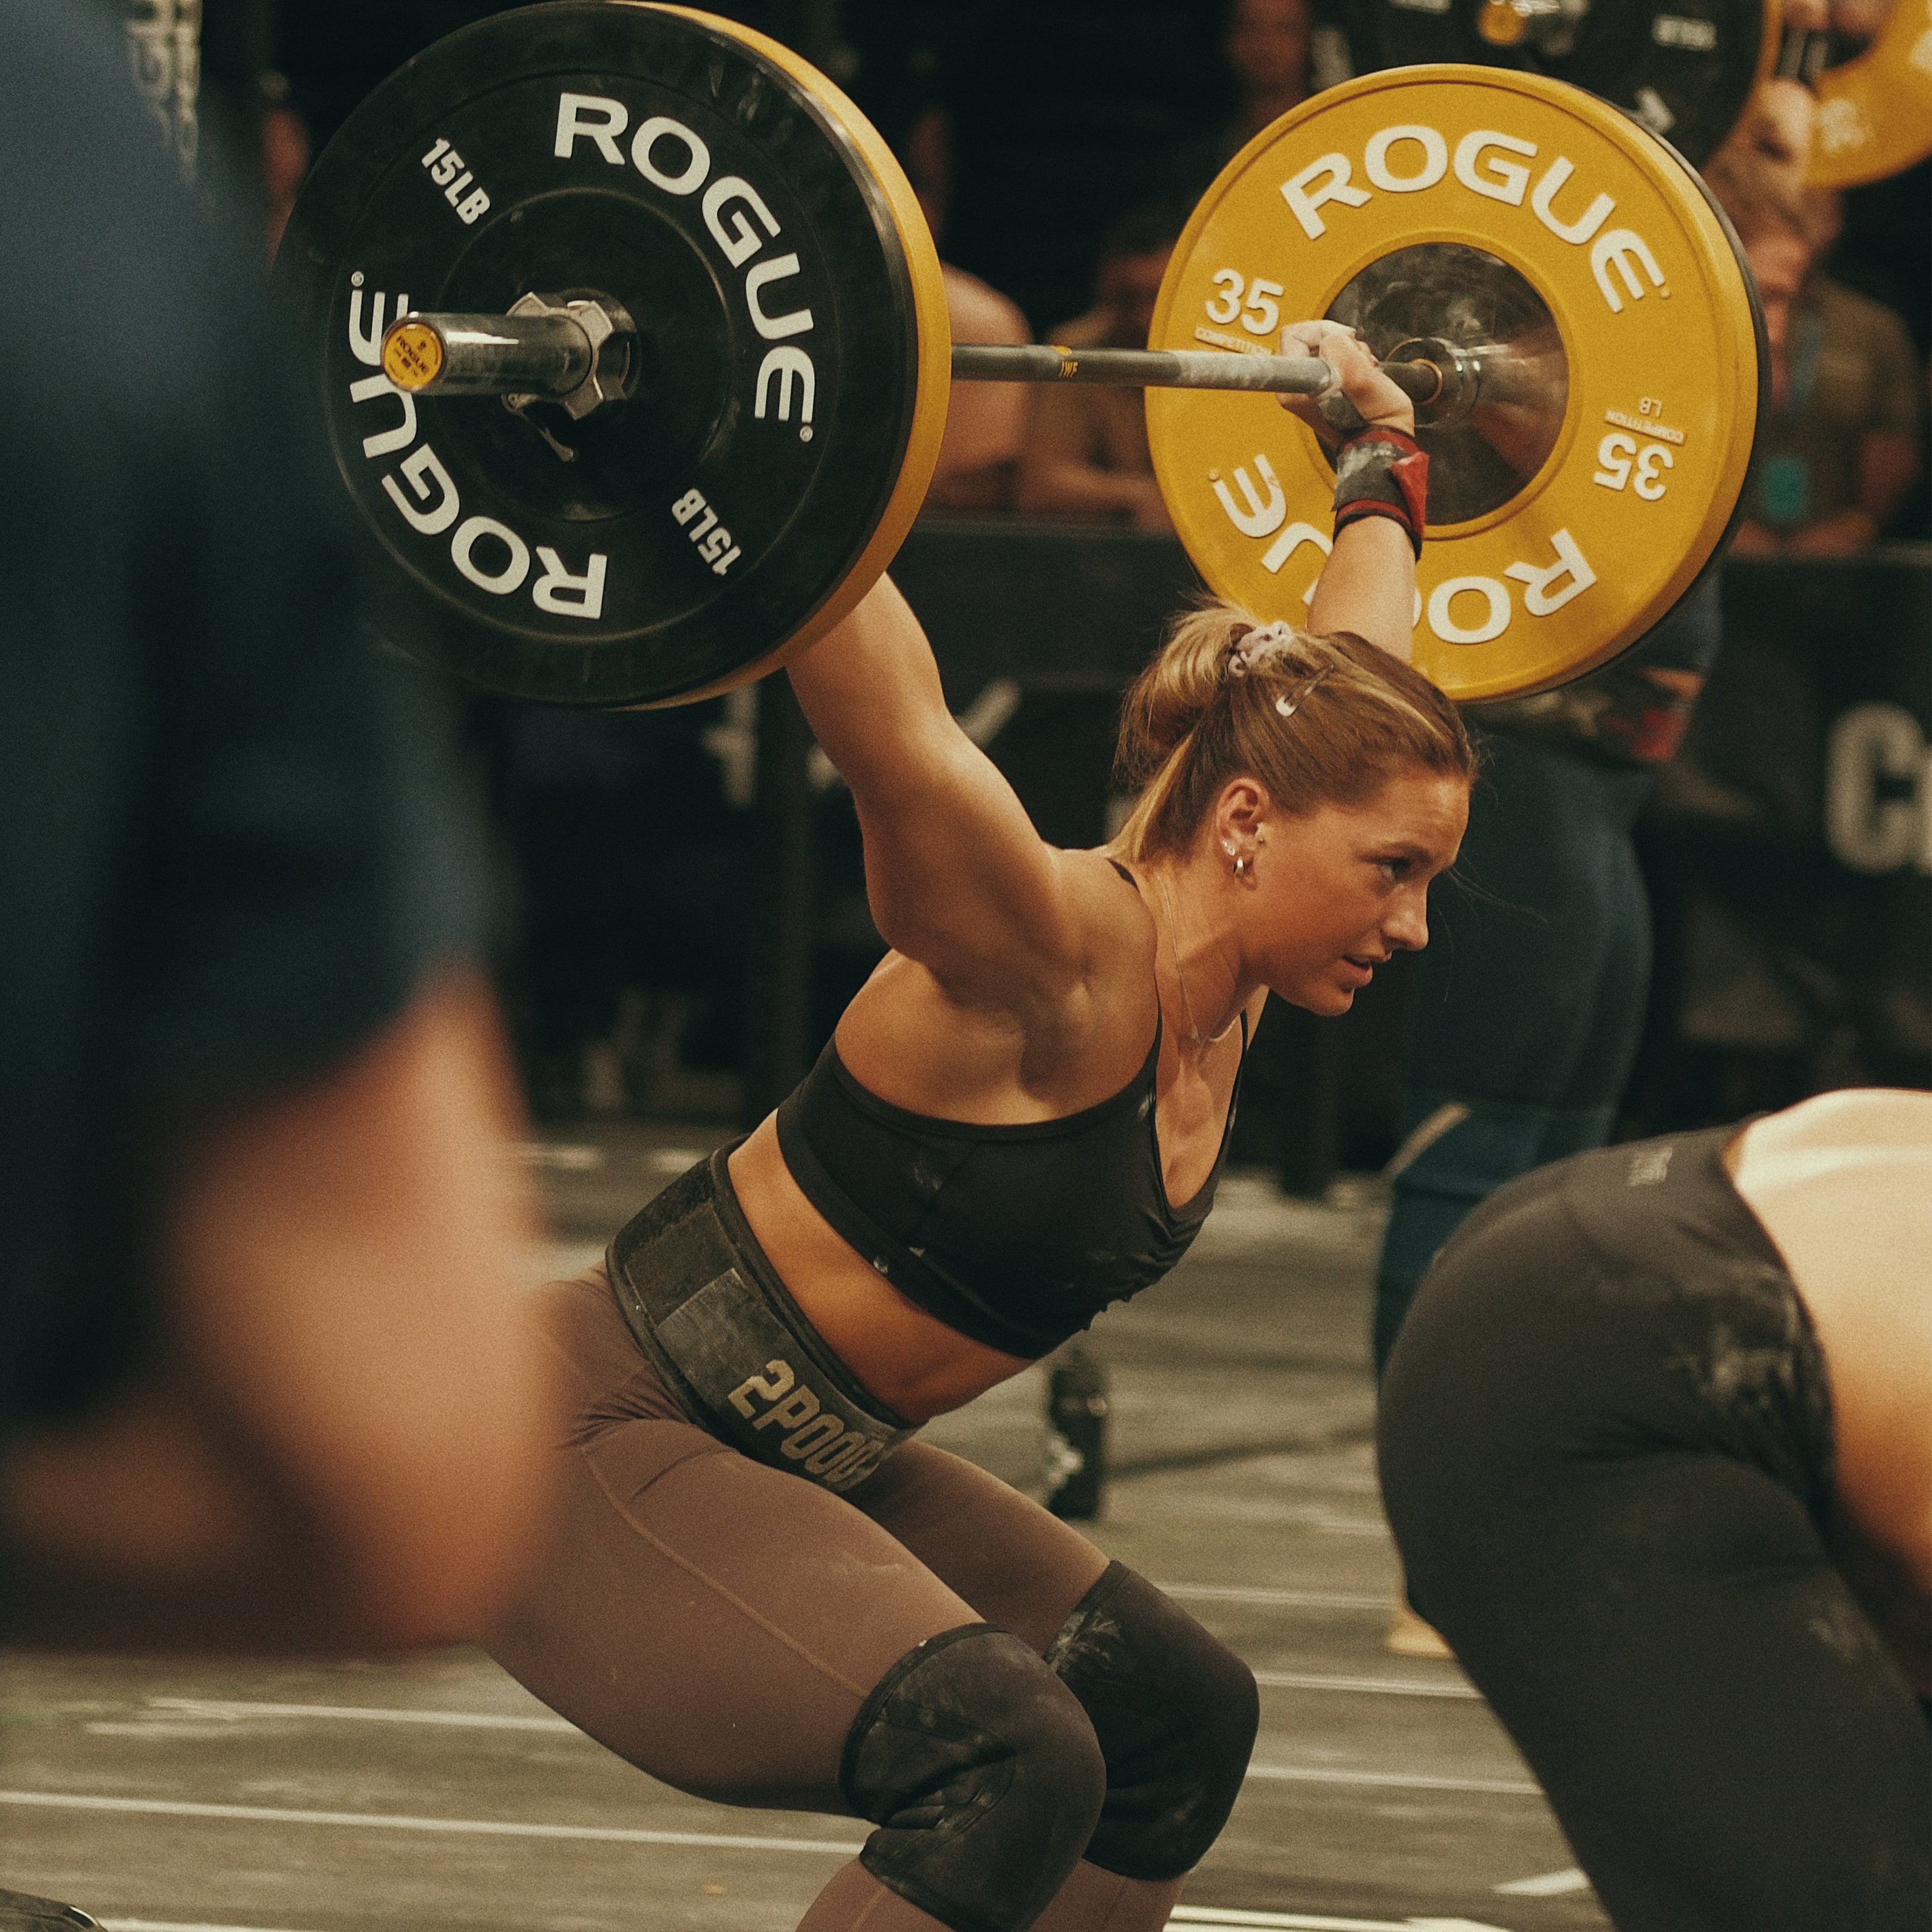
The push jerk is where strength meets speed. Using explosive leg drive to create momentum before dropping underneath the bar, this move allows you to shift heavier loads overhead more efficiently than pressing strength alone.
The challenge isn't getting the bar higher. It's getting yourself underneath it faster. That's what separates a push jerk from a press and why mastering the movement can unlock heavier overhead lifts.
Because of this, it's a useful progression from the push press. As the bar gets heavier, there comes a point where trying to press it overhead starts to feel like you're fighting gravity... and losing. The push jerk solves that problem. Instead of forcing the bar higher, you learn to move yourself underneath it, turning a strength challenge into a timing challenge.
Despite looking simple, it's a movement that often causes confusion and seems more complicated than it actually is once you’ve mastered the sequencing. This is why it’s beneficial to break the movement down step by step.
How much leg drive should you use? Should your feet leave the floor? How is it different from a push press or power jerk? And when should you use each variation?
We sat down and spoke to Alex Kirkup-Lee, CrossFit Level 1 coach here at Gymshark, to answer those questions, explain how to perform the push jerk correctly, give technique tips, and discuss the workouts and variations that can help you become stronger and more efficient overhead.
According to Alex, “getting the timing right is often the biggest obstacle athletes face when trying to improve the push jerk. It takes a while to nail, but once you’ve got it, then it feels effortless.”
What Is A Push Jerk?
The push jerk is an explosive overhead movement where you use a quick dip and powerful leg drive to move a barbell overhead, before rapidly dropping underneath it to catch the weight with locked arms.
Unlike a strict press or push press, the push jerk doesn’t rely on your shoulders to finish the lift alone. Instead, your lower body creates force, and your upper body stabilizes the weight overhead while you re-bend the knees underneath the bar.
That ability to move under the load and keep the momentum of the move going is what allows most people to lift heavier in a push jerk compared to a push press [1]. Think of when you do an overhead press; when the weight starts to feel too heavy to push, your natural reaction is to want to bend your knees and push through your legs for momentum to shift the weight up. Do this, and the movement becomes a push press.
The Push Jerk is widely used in:
CrossFit
Functional fitness training
Athletic performance programs
It helps develop:
Explosive power
Coordination
Overhead stability
Triple extension mechanics (explosive extension of the hips, knees, and ankles)
Force transfer between the lower and upper body
“The best push jerks shouldn’t feel as heavy as standard presses. If your timing is right, the bar almost floats for a moment while you move underneath it.” - Alex Kirkup-Lee
How To Do A Push Jerk
You don’t need to have the strongest shoulders in the room to win at the push jerk; it’s all about getting the sequencing right. This means executing the movement smoothly - a strong starting position, smooth dip, powerful drive, and stable press under to stand.
Barbell Push Jerk
Setup Position
Start with the bar resting in the front rack position across your shoulders.
Your hands should sit just outside shoulder-width, with a full grip on the bar and your elbows slightly in front of it. Stand with your feet roughly hip-width apart, brace your core, and keep your chest lifted.
Before you start moving, take a second to take a breath and find your balance.
You should feel connected to the floor through your whole foot, with your weight slightly towards your heels rather than drifting onto your toes. CrossFit coaches often describe the setup as building a stable platform for power.
The Dip
From the front rack, perform a shallow dip by bending your knees and hips.
Rather than dropping forward into the movement, think about lowering yourself directly down between your hips. Your torso should stay upright, and your chest should remain up throughout.
The dip doesn't need to be deep; keep it to a shallow quarter squat - a short, controlled dip allows you to transfer force into the floor more effectively and creates a cleaner bar path overhead.
Ensure your weight stays shifted back toward the heels.
Cue tip: Alex Kirkup-Lee, CrossFit Level 1 coach, recommends envisioning your torso as a vertical elevator travelling strictly up and down in a straight line.
The Drive
As soon as you reach the bottom of the dip, reverse the direction aggressively.
Push through the floor and extend your knees and hips as powerfully as possible. Think about jumping without actually leaving the ground.
This is where the momentum for the lift comes from. The strongest push jerkers are the ones who can drive hard through the floor and create the most efficient transfer of power from their legs into the barbell.
Coaching insight: One mistake coaches see repeatedly is athletes becoming so focused on getting under the bar that they forget to finish the drive. This cuts power output and often limits how much weight can be lifted overhead. CrossFit specifically highlights full hip and knee extension as one of the most important components of a successful push jerk.
The Press Under
As the barbell travels upward, quickly re-bend your knees and move underneath it.
Rather than trying to keep driving the bar higher, your focus should shift to receiving the weight in a stable overhead position.
Your feet may move slightly wider as you receive the bar, and your arms should reach lockout as your feet reconnect with the floor.
The Stand
Once you've secured the bar overhead, stand up fully to complete the lift.
This sounds obvious, but it's a surprisingly common mistake. Athletes receive the bar, immediately relax, and start bringing it back down before demonstrating full control of the position.
Take ownership of the lockout.
Stand tall, stabilise the weight overhead, then return the bar to the shoulders under control before beginning your next repetition.
Dumbbell Push Jerk (Variation)
If the barbell push jerk feels intimidating, dumbbells can be a brilliant place to start.
Because each arm moves independently, dumbbells naturally expose imbalances that a barbell can hide. They also allow for a slightly freer movement pattern, which many beginners find more comfortable as they learn the timing of the lift.
The movement itself remains the same:
Begin in a hip-width stance with dumbbells resting on your shoulders.
Elbows slightly in front of the body.
Torso dips vertically, heels down, legs extend, and drive through the legs.
Quickly move underneath the weights before standing tall to finish.
What changes is the stability demand. Unlike a barbell, where both arms are connected by a fixed bar, each shoulder in the dumbbell variation must work independently to control the load overhead. This makes the dumbbell push jerk an excellent option for improving shoulder stability, coordination, and unilateral strength.
Dumbbell push jerks also transfer well into functional fitness workouts and conditioning sessions. They're often programmed as single-arm or alternating-arm variations to build unilateral strength and stability.
Push Jerk Technique Tips | What Not To Do
Don't Press Too Early
One of the most common push jerk mistakes is trying to press the bar overhead before your legs have finished generating force. When this happens, the lift becomes shoulder-dominant and starts to resemble a push press rather than a push jerk. It doesn’t give you time to snap under the bar. Not only does this make the movement less efficient, but it also usually limits how much weight you can lift.
Instead, focus on letting the legs start the movement before the arms finish it. You're aiming to be under the bar in a shallow dip position before you fully lock out.
Cue: "Legs first, arms last."
According to Alex Kirkup-Lee, “getting the timing right is often the biggest obstacle athletes face when trying to improve the push jerk. It takes a while to nail, but once you’ve got it, then it feels effortless.”
Don't Let The Bar Crash Onto Your Shoulders
This is one way to get sore shoulders. So if you don’t want that, make sure that the lowering phase isn’t an afterthought, especially if you’re performing multiple reps.
It’s easy to spend so much energy thinking about getting the bar overhead that you forget to control it on the way back down. This results in a heavy crash into the front rack position, which wastes energy and makes every rep that follows feel harder.
Instead, try to lower the bar back onto the shoulders with intention, maintaining tension through the upper back.
Cue: "Meet the bar, don't let it meet you."
Don't Dip Forward
Leaning too far forward on the dip is one of the fastest ways to throw a push jerk off and throw your balance off course.
When the chest drops or the weight shifts onto the toes, the bar often travels forward rather than straight overhead. It could be disastrous, but it usually just means that you'll need to work harder to keep the lift balanced and stable.
Aim to keep your torso upright and your weight centred through the middle of the foot throughout the dip.
Cue: "Imagine sliding down a wall."
Don't Try To Push The Bar Higher Than Necessary
You’re not trying to push the bar through the ceiling. Getting the bar as high as possible is not what makes a better push jerk. The goal is to create enough height to move underneath the bar quickly and efficiently.
Focus on reacting faster and getting under the bar as fast as possible, not pushing the bar as high up as you can.
Cue: "Legs drive the bar up, arms push your body under."
Don't Settle For A Soft Lockout
If you receive the bar overhead passively, it's likely to feel unstable, and this could cause injury.
Many missed lifts happen because athletes hesitantly guide the bar overhead rather than aggressively locking it out. Even if the weight reaches the correct position, that slight lack of confidence can make it feel shaky and insecure.
Attack the lockout position and actively push into the bar as you receive it.
Cue: "Fast hands."
Push Jerk Muscles Used & Movement Patterns
The push jerk is often thought of as an overhead pressing exercise, but the reality is a little more complicated. The push jerk is actually a lower-body power movement with heavy trunk stabilization and an overhead catch, rather than an arm-dominant press.
It’s that combination of lower-body power and upper-body stability that makes the push jerk such an effective movement for athletes looking to improve strength, explosiveness, and coordination.
Here’s the breakdown of the muscles and movement patterns used in a push jerk:
Primary muscles worked:
Quads: The quadriceps provide the initial horsepower for the dip and drive. Quad strength helps you lower into a dip with an upright torso and then explosively extend the knees with upward force.
Glutes & Hamstrings: The glutes and hamstrings are responsible for producing powerful hip extension as you launch the bar overhead. Alongside the legs, these muscles are responsible for developing force transfer, which is also key for running and sprinting.
Deltoids: The delts are used in the lockout phase of the jerk press, stabilizing the shoulder as you press the weight overhead. The front deltoids power the drive, while all heads of the deltoid contribute to stabilizing the bar overhead.
Triceps (stability): The triceps help extend the elbows and secure the final lockout position. In a well-executed push jerk, the triceps act more as finishers than prime movers. Their job is to rapidly punch the arms into elbow extension and create a stable overhead hold.
Study callout: Biomechanical analysis of the jerk has shown that the largest contribution to force production comes from the lower body during the drive phase, highlighting why powerful quads, glutes, and hips are so important for successful lifting.[2]
Secondary muscles worked:
Core (Obliques, Transverse Abdominis, Erector Spinae): A strong brace is key to a strong push jerk. The core acts as the bridge between the lower and upper body, helping transfer the force generated by the legs into the barbell. Your core must remain tight to prevent power leaks, which affect how well you can maintain an overhead position.
Trapezius & Lats: The upper back works throughout the movement to support both the front rack and overhead positions. The traps, rhomboids, and rear deltoids help maintain posture, shrug the bar to create momentum, and create the stable shelf needed to receive heavier loads safely.
Movement Patterns Developed
One reason the push jerk is so valuable in functional training is that it trains several important planes of movement simultaneously.
Triple Extension: Like jumping, sprinting, and Olympic lifting, the push jerk involves powerful extension through the ankles, knees, and hips. This coordinated action is often referred to as triple extension and is one of the key foundations of explosive athletic performance.
Overhead Stability: The push jerk teaches you how to hold, catch, and punch weight overhead while maintaining strong positioning through the shoulders, upper back, and core. This can carry over to other overhead lifts such as the shoulder press, push press, split jerk, and clean and jerk.
Force Transfer: Possibly the most important skill developed by the push jerk is learning how to transfer force efficiently from the lower body into the upper body.
Research comparing overhead lifting variations has shown that jerk movements can generate high levels of power output because they allow athletes to utilise the larger muscles of the legs and hips while reducing the amount of work required from the shoulders alone [3]. In simple terms, the push jerk teaches you how to use your whole body as a system rather than relying on a single muscle group to move the weight.
3 Push Jerk Crossfit Workout Ideas For Strength, Conditioning & Skill
Workout 1: “DT” (Hero WOD – Push Jerk Classic)
5 Rounds For Time
12 deadlifts
9 hang power cleans
6 push jerks
DT is one of CrossFit's most well-known Hero WODs and a benchmark many athletes return to throughout their training journey.
What makes DT challenging isn't the individual movements; it's the cumulative fatigue that builds after maxing your output.
By the time you reach the push jerks in each round, your grip is taxed, your heart rate is elevated, and your shoulders are already working hard to stabilize the barbell. Athletes who rely on pressing strength often struggle here, while those with efficient jerk mechanics can continue moving smoothly under fatigue.
What It Develops
Full-body conditioning
Grip endurance
Barbell cycling efficiency
Mental resilience under fatigue
When To Program It
DT works best as an occasional benchmark workout rather than a weekly training session.
Performing it every couple of months can provide a useful snapshot of improvements in conditioning, movement efficiency, and pacing strategy.
Workout 2: Shoulder-to-Overhead Complex Builder
Every 5 Minutes x 7 Sets
3 push presses
2 push jerks
1 split jerk
Aim: To build weight gradually across all seven sets.
This complex teaches athletes how the different overhead movements relate to one another while exposing the strengths and weaknesses within each variation.
It’s a triple threat. The push press develops overhead strength, the push jerk improves timing and power transfer, and the split jerk challenges stability and precision.
By combining them into one sequence, you’re able to build a more complete understanding of overhead mechanics.
What It Develops
Overhead strength
Timing and coordination
Positional awareness
Confidence under heavier loads
When To Program It
This is best placed at the start of the training week or on a dedicated strength day when fatigue is low, and technique can remain the priority.
Workout 3: 10-Minute Push Jerk AMRAP
AMRAP 10
Row for calories
10 push jerks
Simple on paper. Much harder in practice.
This workout challenges your ability to maintain efficient movement patterns as fatigue accumulates. The rower drives up the heart rate while the push jerks test whether you can continue producing power without sacrificing technique.
Athletes often discover that small inefficiencies become magnified as the workout progresses. A crashing barbell, poor front rack position, or rushed setup can quickly cost valuable seconds.
What It Develops
Aerobic capacity
Barbell cycling efficiency
Overhead endurance
Movement consistency under fatigue
When To Program It
This workout works well as a midweek conditioning session or as a shorter finisher following strength work. Because the volume is moderate, it provides a conditioning stimulus without significantly impacting recovery.
Push Jerk Vs Push Press
At first glance, the push jerk and push press look almost identical. Both start with a dip and drive. Both use the legs to generate momentum. Both finish with the bar overhead.
The difference comes after the drive phase.
In a push press, you use the momentum generated by the legs and then continue pressing the bar overhead with your arms. Once you've driven through the floor, your knees stay extended, and the shoulders do the remaining work.
Push Press:
In a push jerk, the legs drive the bar upward, but instead of pressing the weight the entire way, you quickly re-bend the knees and move underneath it to receive the bar in a stronger position.
That small change has a big impact on how much weight you can lift.
Because you're reducing the distance the bar needs to travel relative to your body, most athletes can move more load in a push jerk than in a push press.
When Should You Use A Push Press?
The push press is often the better choice when your goal is building overhead strength.
Since the shoulders and triceps contribute more to finishing the lift, the movement can help improve pressing capacity and reinforce strong overhead mechanics.
For beginners, it's also generally easier to learn because there are fewer moving parts and less emphasis on timing.
Choose the push press if you want to:
Build overhead pressing strength
Develop stronger shoulders and triceps
Learn basic dip-and-drive mechanics
Improve overhead confidence
When Should You Use A Push Jerk?
The push jerk shines when power, efficiency, and moving heavier loads become the goal. When comparing the push press and push jerk, findings show that athletes were able to perform jerk variations with significantly heavier loads, largely because the re-dip phase allows them to receive the bar in a stronger position rather than relying solely on pressing strength. [1]
This potential for progression helps skilled lifters and elite athletes to break through plateaus and build explosive power, which improves overall Olympic lifting techniques. It also uses leg drive to assist the upper body, making it much more energy-efficient than strict pressing during long workouts.
Jerk’s also allow you to cycle lighter to medium weights quickly because the feet remain stationary. This allows for fast, repetitive overhead cycling, which is fundamental to conditioning workouts, and why you’ll often see them in such programmes.
Choose the push jerk if you want to:
Lift heavier loads overhead
Improve explosive power
Develop barbell cycling efficiency
Improve force transfer between the lower and upper body
For many athletes, the push press builds the foundation, and the push jerk builds on it.
Push Jerk Vs Power Jerk
The push jerk and power jerk belong to the same family of overhead movements and share the same goal: moving a barbell overhead as efficiently as possible. The difference lies in how you receive the weight.
In a push jerk, the athlete catches the bar overhead while dropping into a shallow partial squat. The feet generally remain in the same position throughout the movement.
In a power jerk, the athlete receives the bar while jumping into a slightly wider stance, while sitting slightly deeper underneath the weight.
It sounds like a subtle distinction, but the change can significantly affect timing, balance, and mobility demands.
Push Jerk:
The push jerk is often considered the most accessible jerk variation if you’re new to overhead lifts.
Catching the bar feels more natural, the footwork is minimal, and the movement is forgiving enough to allow athletes to focus on timing and power production.
For that reason, it's usually the first jerk variation taught in CrossFit.
The push jerk is often best for:
Learning overhead timing
Building confidence under the bar
Developing power production
Improving barbell cycling
Power Jerk:
The power jerk places greater emphasis on precision and speed.
Because the receiving position is wider and slightly deeper, the challenge is whether you can move under the bar more aggressively while still maintaining balance and stability.
The margin for error is smaller, but if you can master the movement, you can become extremely efficient in overhead pressing.
The power jerk is often best for:
Advanced athletes
Improving speed under the bar
Developing overhead confidence with heavier loads
Progressing toward more advanced Olympic lifting variations
If you're new to jerk variations, the push jerk is usually the better place to start. Once your timing, positioning, and confidence improve, experimenting with the power jerk can help expand your skill set further.
How To Program Push Jerks
How often to practice:
Like any technical lift, the push jerk requires consistent practice rather than the occasional max-effort sessions.
So what does this look like in training?
For most people, 1-2 sessions per week are enough to improve technique while still allowing for plenty of recovery.
If you’re new to the movement, you might want to dial that down to one session a week and include skill work with lighter weights and form practice.
How many reps/sets:
Depending on your goals, your set and rep count will differ.
For practicing technique:
4-6 sets of 2-3 reps
Light to moderate weight
Focus on crisp, smooth repetitions
For strength:
4-6 sets of 1-3 reps
Moderate to heavy weight
Higher effort, so rest 2-3 minutes between sets to recover
For conditioning:
Higher reps within circuit-style workouts
Typically range from 15-35 reps for heavy loads or 50-75 for lighter loads
What weight to use:
The right weight for a push jerk is also dependent on your training goals, technique proficiency, and current strength level.
If you're learning the push jerk, you might want to start with a PVC pipe, empty barbell, or light dumbbells until you nail the movement.
Here are some benchmark 1RM numbers you can follow as a rough guide:
Male beginners to novice: 42kg to 63 kg
Female beginners to novice: 28kg - 39kg
Male intermediate to advanced: 89 kg - 120kg
Female intermediates: 52 kg - 68kg
Male elite: 154 kg
Female elite: 84 kg
These numbers are intended as benchmarks rather than targets. Your focus should always be on building solid technique first, then gradually increasing the load as your confidence and consistency improve.
How To Warm Up For The Push Jerk
A good push jerk starts with the warm-up. You want to prep your shoulders, hips, ankles, and front-rack position with dynamic mobility exercises and move through the movement patterns you’ll use under the bar.
Mobility Prep
Aim: To improve mobility where you need it most while activating the muscles responsible for producing power and keeping the bar stable overhead.
Complete 1 to 2 rounds of:
10 arm circles forwards and backwards (warm up the shoulders, rotator cuff, and upper back to prepare for the overhead position)
10 band pull-aparts (activates the rear deltoids, rhomboids, and mid-trapezius to improve upper-back stability)
10 PVC pass-throughs (increase mobility through the shoulders, chest, and thoracic spine, helping you achieve a stronger overhead position)
8 front rack elbow raises (improve mobility in the wrists, triceps, lats, and front rack position for a more comfortable barbell setup)
10 bodyweight squats (primes the quads, glutes, hamstrings, and hips while reinforcing an upright squat position for the dip and catch)
8 World's Greatest Stretches (4 per side) (opens the hip flexors, glutes, hamstrings, thoracic spine, and
ankles, improving overall mobility for the lift)
10 ankle rocks per side (increases ankle dorsiflexion and calf mobility, helping you maintain balance and an upright torso during the dip)
Barbell Specific Push Jerk Warm Up
Aim: Perform a series of push jerk drills, with each one building on the previous one, helping you groove into the dip, drive, and catch before adding the weight.
Use an empty barbell to perform:
5 strict presses
5 push presses
5 dip-and-drives (no press)
5 tall jerks
5 push jerks
Once you’ve completed the mobility warm-up and the push jerk drills, your movement should feel smooth enough to begin adding weight in increments until you reach your working sets or 1RM.
If you feel anything start to slip - like timing or technique- reduce the weight and focus on moving fast before moving heavy.
FAQs
Is The Push Jerk Safe For Beginners?
Yes, if you approach it the right way! The push jerk - similar to other jerk movements- is a complex technical lift, so if you’re starting out, don’t dive straight into the heavy weights and focus primarily on understanding the movement, timing, and getting your form correct.
Many coaches begin teaching the push jerk with light equipment so that you can get a feel for the movement and nail the basics - look out for:
PVP pipes
Empty dumbbells
Light dumbells
The goal early on isn't lifting heavy. It's learning how to coordinate the dip, drive, and catch phases into one smooth movement. Once that timing develops, adding load becomes much easier.
What’s The Difference Between A Push Jerk And A Push Press?
If you’re learning the push jerk, it’s natural to wonder how it differs from the push press. After all, both movements start with a dip and drive, and at first glance, they are almost identical.
The biggest difference comes with the leg drive.
With the push jerk, it’s about creating the momentum, then quickly getting under the bar with an almost micro-jumping movement. The aim is to lock the bar above you in a strong position, rather than push the bar higher, as you’d do in a push press.
With a push press, you use the momentum from your legs, bending them slightly before pressing the bar all the way overhead with your shoulders and triceps.
Why Does My Push Jerk Feel Unstable?
If you don’t feel stable in your push jerk (perhaps a little shaky when you have the barbell overhead), you’re not alone. It’s a tricky movement and one that requires a lot of practice.
Feeling unstable in your push jerk can often be caused by poor timing, a forward dip, or an inconsistent catch position. Because you’re receiving the bar overhead without a split stance, even small balance errors can feel exaggerated - causing you to wobble. Other causes for feeling unstable are:
Dipping forward instead of straight down
Pressing with the arms too early
A soft or incomplete lockout
Landing with the feet too narrow
What's The Relationship Between Jumping Movements And The Push Jerk?
The push jerk relies on the same explosive triple-extension pattern used in jumping.
During the drive phase, the ankles, knees, and hips extend forcefully to generate power. This coordinated movement pattern is seen in sprinting, jumping, Olympic lifting, and many team sports that require a high rate of force development and power output [4].
While your feet typically stay connected to the floor during a push jerk, the aim of the movement is very similar: generate as much force as possible in a short amount of time. It feels like a jump, without your feet actually leaving the floor.